Monday 30 March 2015

Bird Beauty-DT Card for The Corrosive Challenge Blog


Hello darlings!
Today I'm sharing the card I made for the Corrosive Challenge Blog.
 Our sponsor this fortnight is Sami Stamps.
  https://www.etsy.com/shop/SamiStamps
Our theme is Hop Into Spring!
Create a Spring or Easter project
Sami, generously provided the DT with an image of our choice and I've chosen 
Bird Beauty to work with.
 Our winner will receive the generous prize of a $12 Gift Certificate to
 Sami' Stamps shop!
You will find tons of lovely inspiration on her blog and fb page.

The sentiment,

 "And Spring arose on the garden fair,
like the spirit of love,
felt everywhere!" 

is from a Kraftin Kimmie stamp set, Fabulous Frames.

Does it feel like Spring yet where you are? I heard we might get snow for Easter. Lovely! 

The paper is from MME-A beautiful Life.
The delicate chipboard pieces are from Make It Crafty. N/A
(It was from a little freebie set Zoe would gift in along with your purchases.)
I colored the chipboard up with some Viva Inka-Gold paints.
The sentiment is stamped with Stazon ink onto Modeling film, heated and manipulated into shape.
It took will power NOT to put Fran-tage on this card!

I colored up this beautiful image with my new Prismacolor pencil crayons!
You might not be familiar with my story about the pencil crayon set
 that got "lost" 7 years ago, after the last time I moved.
I had a set of 120. A Christmas gift. The set came in that nice glossy black Anniversary box.
I sharpened all 120 pencils and enjoyed looking at them as they just sat in their box. All shiny and new...and barely used over 3-4 years.
I moved to a different city and the pencils somehow never come along with me.
 I'm still a little bewildered about their disappearance.

A few years ago I started making cards using digi images and invested in a
 full set of Copic markers...
 ...to help me get over the trauma of loosing the pencils.

The markers kind of helped but the pencils were still always in the back of mind though, and last week, Michael's had an awesome 1 day sale going on.
 The crayon sets were 40% off and then you could use another 20% off coupon on the sale items.
I figured if I was going to replace those pencils now was the time!
But would I use them?
What if they only just sit in the box and look pretty again?
And did I even really want them anymore now that I have my Copics?
After about 10 minutes of wondering, and contemplating on what to do, and on which set to get, I decided on the 72 box set.
Regular price $170-sale price $81.00 Canadian

Okay, so I brought the pencil crayons home and decided I would use them for the next challenge.
I was unexpectedly delighted with how, Bird Beauty turned out!
It was awesome coloring and blending all that hair with the pencils!
I don't have a clue how to use them really, but I just incorporated what I have learned from my Copic coloring classes.
What I loved about them so much was their blending abilities and how new colors emerged right before my eyes by overlaying different colors.
The best part of course is that I can let anyone use them and not worry that they'll get damaged tips like a Copic marker might. :)
Also, the pencils come in a tin, and come pre sharpened!
That was a bonus!

My kids came over for the weekend and I was able to enjoy some time with my granddaughters, watching their artistic talents develop.
They found a stack of printed digi images on the table and just colored to their hearts content.


L-Morgan 6 R-Hailey-7

Thrilled, and so glad I decided to get the pencil crayons!!
This set is actually going to get used and loved!
 I think I should have bought the 132 pencil set now though! 
 (It was probably a good thing they were out of stock at the time) ;)
I have a feeling there will be a lot of happy coloring happening each time my lil' kittens come over for a visit.

Thanks for stopping in today,
 and if you have a Spring or Easter themed project be sure to link up with us at TCCB and you could be the next random winner to receive a
 $12 gift certificate from Sami Stamps.

After every challenge my teamies and I get to pic our favorite creation you've linked up, and those get highlighted on the challenge blog.
I love seeing what you've created.
Happy Spring!
B-U-nique! Hugs!


Monday 16 March 2015

A Fran-tage Tutorial

Hello darlings!
I wanted to share a humble little picture tutorial with you on how I add Fran-tage to my cards.
As I was making this card last night I thought I should take some pictures and make a tutorial.
So here we are!
Sorry in advance for the shadowy pics. It was late, and dark, and I was working at the kitchen counter where the light isn't the best.
I tried to add this post to my Tutorial page but alas,
 I have no idea how to do that so for now it's a regular blog post.

Let's begin...


This is what all the fuss is about! That fabulous shabby enamel by Stampendous! Fran-tage.

I have it in 5 different colors
Shabby Pink, Shabby Blue, Shabby White, Aged Silver, and Aged Gold.
I mostly just use the Shabby White.


This is what my card sort of looked like before I Fran-taged it!
Nothing was glued down yet because I like to do each layer of paper, one at a time before I assemble the card.
That way you get less buckling in your card from the heat having to travel through all the layers.
Trust me on this!
You'll also be more in control of where, and in which direction the enamel flies around when you do one piece, and one section at a time.

To Fran-tage takes patience! I don't always have that for this so I use the hottest heat tool I own. 

I have a couple of heat tools but I still love my original Milwaukea heat tool(paint stripping tool) circa 1980's from when I first started
 stamping/heat embossing.
That baby means business and it's HOT!

 You're going to need:
-Fran-tage
-Heat tool
-Versa Mark ink
-makeup sponge
-tweezers
-Empty chocolate box lid

Also, you will probably want to work in an area that's easy to clean up.
I prefer to use the kitchen counter.
In the past I've worked at the kitchen table and I now have enamel flecks melted to my hardwood floor!


Here, I've just inked up the makeup sponge and I'm dab, dab, dabbing in the corner and half way up each of the joining sides of paper.
I like to sponge and emboss small sections at a time.


Lay your paper in the chocolate or card box lid and sprinkle as much enamel over the versa mark ink as you like.
I was quite generous here.
-Press the enamel into the paper with your fingers before you begin heating.
This helps to keep all the fine loosey goosey fly-away flecks on your paper...kind of!


I'm holding the heat tool about 6"-8" away so that the enamel doesn't all fly off!
After about a minute you'll be able to see it beginning to melt/stick just slightly.
That's when I'll bring the heat tool in for the kill and hold it about 2"-3" away, turning the Fran-tage into a puddle of molten kewlness!


The idea here is to get as much enamel to stay on your paper as possible.
Be sure to shake the extra enamel from your box lid back into your container before continuing with each side so you don't end up making the bottom of your box too messed up with Fran-tage.
If good chocolate boxes are hard to come by, you can cover the inside of your box with a piece of tin foil and just replace when needed.
If you don't have a good box lid to work in, this will give you an excellent reason to buy your self a box of chocolates and to eat them...after all you need an empty chocolate box to keep with your craft stash.
I'm obviously not too worried about my box lid so it would seem I am getting enough chocolate! :)


I'm pressing the enamel into the versa mark here just before I take the heat tool to it.
Just so you know, it's not easy to heat emboss and take pics at the same time!
Thankfully nothing melted or caught on fire!


Like I said I was very generous with the Fran-tage application.
I tried to do it a little more sparingly on the top right hand corner side so you could see a difference.


This piece shows the Fran-tage sprinkled and pressed into the Versa mark that I dabbed on with the sponge.
I haven't applied the heat to the bottom section here yet.
 
 
Here you can see some melted and some not melted enamel.
make sure there is not enamel flecks on the main parts of your image!
You can keep a small paint brush handy to brush away any that might have blown onto an area where you didn't want it.
 
 
Ta-Da!  The molten lovliness!
 
 
I painted a chipboard heart with distress paint, then inked it up with Versa Mark ink and sprinkled lots of Fran-tage on top and pressed it down with my fingers.
 
 
Keeping the heat tool at a far enough distance away so that not all of the enamel blows all over the place.
You will need to play around with your heat tool to find out what distance and for how many minutes works best for you.
 
 
I love this part! When the glitter and enamel all melt and fuse together.
Let this cool for a couple minutes before you touch it or use a pair of tweezers to handle.
Here's a Prima flower that I sponged with Versa Mark ink and sprinkled Fran-tage on.

 
I think you can Fran-tage just about anything.
Please use caution when using your heat tool on different materials!
 
 
Here's the Prima flower after the enamel has been heated.
 
 
I should have timed this to see exactly how long it took me to Fran-tage everything but I think it was about 20 minutes?
It should go a little faster if you're not taking pictures as you go though.
So now I have all the layers and embellishments Fran-taged, and I'm ready to assemble my card.
 
 
Fran-tage can make your simply lovely card a fabulous piece of awe inspiring art!
Simple right?
The image I used on this card is a Pinkydolls digi called, Cookie with Bunny.
 
 
I love all the golden highlights and all the fabby shabbiness!
Whenever I make a card and think,hmmm it just needs something! I'll pull out the Frantage and that jazzes it all up!
I hope this tutorial was helpful to you! Please leave a comment and I will answer any questions here.
I think I used the word Fran-tage(d) 16 times in this post!
Your turn! Have fun!
B-U nique! Hugs!

Sunday 15 March 2015

Pinkydolls Cookie With Bunny-DT Card for The Corrosive Challenge Blog


Sparkling
 
Hello darlings!
I'm finally back with a DT card for the new challenge at
Our sponsor this fortnight is Pinkydolls
 

I have been wanting to color up a Pinkydoll since I first saw one about a half a year ago.
You can find the fb page here. Be a fan! 
Chrishanthi, often has beautiful freebies she shares.
The cutie I got to play with is Cookie with Bunny.
The new TCCB challenge is Our Animal Friends.
Include an animal in your project and you are good to go!
The random winner will receive 3 digis of their choice.

I was very generous with the Frantage with this card!
Once again I used Vintage Summer Basics paper by Maja Design.
 And matted everything with kraft paper.
I distressed all the edges with Pumice Stone distress ink and then used a distress tool to roughen up all the edges.
I added some Diamond Stickles to cookies' hair. 
I love how her long flowing ponytail reminds me of an octopus arm.
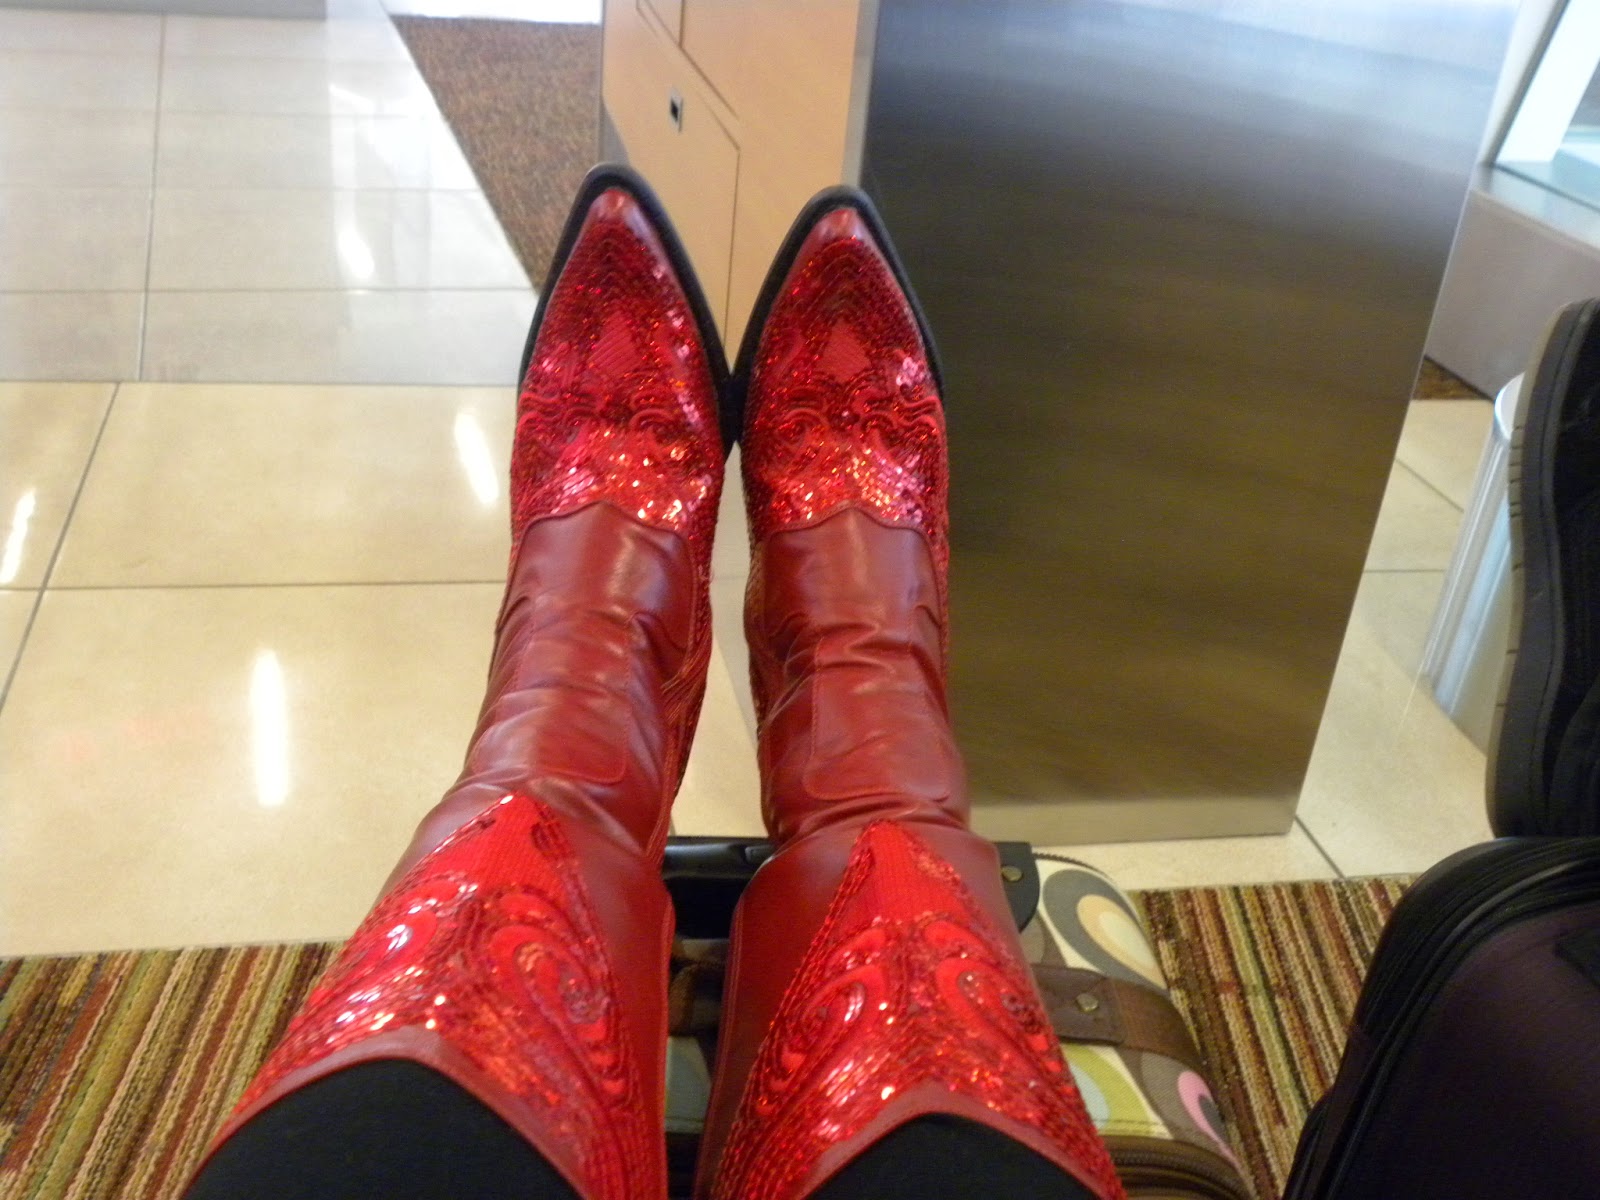
Cookie's fabulous little boots of course had to be red and glitterful! Just like the pair I have!
My Traveling Boots
 I've been busy all week adding lovlies to my Etsy shop.
It's chocka block full now!
And did you notice my shiny new button in the left hand corner of this blog?
I finally made a facebook page for my art!
Please check it out and be a fan!
We'll be one step closer to being connected!
I'm now wondering if I need to add a,"follow me" Pinterest button here.
Maybe Instagram?
I haven't ventured into Instagram yet...
Oh, yeah you can connect with me on twitter too.
I should probably find out how to make a twitter button.
Wow, I'm so socially connected now!
So other details about my card...hmmm not too much, it's mostly about the Frantage and the adorable Pinkydoll image.
The sentiment, "Sending butterfly kisses, hugs and wishes!" is from a Totally Stampalicous stamp set.(NLA)
A muted Prima flower, chipboard hearts, lace, and a little bling and glitter.

 I tried to take a few pics while I was Frantaging this card so I'll see if I can make some kind of humble picture tutorial with the pics I took. 
It's really so easy and can transform your simply lovely creation into something like mucho fabulous!
For more Pinkydoll inspiration check out TCCB and look at what my teamies have been up to.
I'll looking forward to seeing what you'll share with us.
Now to get busy with a Frantage tutorial.
B-U nique! Hugs!


Tuesday 3 March 2015

Wizardette- Tiddly ink


Hello darlings!
I'm getting to the end of my card pile. Just a few more to share and then I'll have to start making a new pile of cards to share with you.
How fun it's been for me the last couple of weeks, to be so active with my blog.
 I'm almost at 100 followers! Thank you for joining me on this journey!
Your lovely comments are always so encouraging, and reading each one is like eating up a delicious morsel
that fills me up!
Oh! I should plan some kind of a candy give away soon!
I'll have to figure out how that all gets done, and of course collect some fun blog candy, but I already know I'll be including one of my dough art Card Makers as part of the "candy"!
 

Finally, I started a fb page for my cards and dough art last night! I think I have most of it figured out. 
At least I have some pics added.
Here's a link so you can have a peek!
 
Today I'll start adding items to my Etsy shop and try to get everything linked up here, there, and everywhere with all of the fancy linky buttons.
Once again I will be learning as I go. This always takes time!
I set aside 10+ hours to do that today so, we'll see how far I get.
The webby world can be so distracting! 
Gotta keep focused!
Okay, but first, I wanted to share another card with you!
It features this magical image from Tiddly Inks called, Wizardette.
This is the last of the images I had colored up with Alyce's Youtube tutorials.
This video tutorial is about making things glow!
I loved coloring this up!
 

The sentiment,
"What each of us becomes is fashioned from the stardust of our dreams"
 is from a SU set called Stardust.
So true!
 
The background paper is from Bo Bunny Weekend Market paper pack
I used a couple of my favorite die cuts, and a piece of TH film strip.
I sprinkled a few black rhinestones and some clear dew drops throughout.
I love how glow-y the image turned out!

That's it for today lovies...see you again tomorrow!
B-U-nique! Hugs!

Recipe:
Skin: E000,E00,E11,E21 YG00,G17,YG23
Hair: E13,E15,E17,YG23,YG00
Scarf: Y11,Y15,Y17,R22,R46,R59
Dress: W3,W5,W7
Magic Bubbles: YG17,YG03,YG23,YG00,0


Monday 2 March 2015

Do You Believe In Fairies? Kraftin Kimmie-Tinkerbell


Hello darlings! 
I'm back with another card to share..
 ...from the stack of cards I made, that I never got around to blogging about, until now
That's why you're seeing so much of me lately.
I'm on a mission to get all of my unblogged cards blogged.
I'm always surprised at how quickly cards can accumulate.
I have an  Etsy shop, which is empty right now, but I'm hoping to fill it up, as soon as I get a face book page made.
Yep, big plans for this week! I'm excited to see how it will all come together.
As soon as I have it up I'll be sure to link you up!
The card I'm sharing today is one I made with an image, I colored up with another video tutorials by Alyce. You can find it, and a few others on youtube.
This tutorial  It's about coloring transparent objects, and  features a rubber stamp image from, Kraftin' Kimmie to color along with.
Another  awesome, Annie Rodrigue design! Tinkerbell!
Tink looks like she has a lot of spritely attitude! I like that!
As a kid, I loved it when, Hook captured, Tink and locked her in his lantern!
That pleased me so very much, because I had always wanted to capture a little fairy of my own!
Hook was my hero! Haha! Obviously I may have issues!
So I've captured my Tinkerbell in a shaker card forever! Or at least until Peter comes to release her from her prison with the key, I left behind for him to find. ;)
I love shaker cards because they're interactive.
Give this one a few shakes and you'll see Tink in flight. Kind of. If you close one eye and imagine really hard!
 I filled this shaker with clear micro beads and a few select sequins.
It sounds really fun too!
The sentiment," Do You Believe In Fairies?" comes with the Tinkerbell stamp.
The paper is from the Prima Art Journal pad.
The lock, key, and crystals are also from Prima.
Fairy dust was found, second star to the right, straight on to morning.
Hope you were fabulous on your Monday! See you tomorrow sunshine!
B-U nique! Hugs!

Recipe:
Skin: E000,E00,E11,E04,R20
Hair:Y21,YR23,E15,E18
Dress: YG11,YG23,YG63,YG67,G99
Wings: B000,B00,B02

Sunday 1 March 2015

Queen of Hearts-DT card for The Corrosive Challenge Blog


Hello darlings!
It's time again for another fortnightly challenge at The Corrosive Challenge Blog!
;)
Our theme for this challenge is Follow Your Heart
-include hearts in your project-
Our sponsor is Faery Ink
This is the first Faery Ink image I've worked with, and isn't Queen of Hearts delightful!
 I have a few more of Amanda's sweet images I'll be coloring up.
One, is a very kewl owl.
You can find  it, as well as some other awesome freebies on the Faery Ink fb page here.
 And you can find more inspiration on the Faery Ink challenge blog.
Once again I've used watercolors to do the background for this image. 
I love using them!
I poured lots of shabby white Frantage over all of the lovely layers. Embossing each layer as I built it.
I've been thinking of doing a little tutorial on just exactly how I do that.
I have no idea how to make a video so I'd have to figure that out first but maybe a picture tutorial first.
I was soooo tempted to use the black and white harlequin paper but I didn't want to look like I'm over using that paper. Ha!
So instead I went with some Pion papers, and did the matting in kraft paper instead of my usual black.
 I love the Pion papers for when I don't really want to see a lot of background color.
 Just some hint, or hue, or reflection of a muted color.
 And of course the more you cover it up with stuff, the less you even notice what color it is.
So always another good choice for when you can't decide on what color or pattern paper to use.
 The sentiment,"Do all things with love!"
 is from a Kraftin Kimmie stamp.
I added a mini playing card from a little deck of cards that I picked up at the dollar store. 
 A little bling paperclip, a strip of lace, a bit of cheese cloth, and a feathered butterfly that I altered with diamond stickles were all used in creating this card. 
I haven't decided if it will be a Valentine, or an all occasion card.

Well I had an interesting day Saturday!
First I showed up at my husband's niece's home for her baby shower only to find out it's next Saturday!
 It was only RSVP by today! Ugh!.
When we pulled up I was wondering why there were no cars in the driveway.
No problem, we had a nice car ride with Isabella. 
Then my bestie came over, and we went out for dinner, where we talked and laughed for a couple of hours.
 I gave her a beautiful Valentine, and after that we went to a
 Stella and Dot party at the home of a mutual friend.
My first ever Stella and Dot party!
And it was a wine and cheese party so it was a lot of fun!
 I wasn't expecting to like any of the product except for some of the pouches and clutches.(which I already have)
Seriously the jewelry in the catalog never caught my fancy...
so I was surprised at how much of it I really liked in real life!
 I love how it looks when it all gets layered together, and I am all about the layers right now.
I chose a couple of fun pieces, but I had to use a little restraint!
Of course I will share pics when it arrives!
I haven't really bought any costume jewelry for about 7 years because I just stopped wearing it or caring about it.
Meh, time to change it up... 

If you have a project that has hearts on it, be sure to join us at TCCB and play along.
There's a prize of 3 digis-your choice from the Faery Ink store for the random winner.
 My teamies and I are enjoying picking out our favorite entries from each challenge, which gets featured on the Corrosive Blog.
Thanks for stopping in today! Have a fabulous Sunday!
B-U-nique! Hugs!

Recipe:
Skin: E000, E00,E11,E21,R20,E04
Red: R22,R32,R29,R59
White: C0, C1,C3
Roses: V000,V04,V06,V09
Black: C1,C3,C5,C10
Gold, YR23,Y15,Y11,Y28,FY1
Hair:YR04,YR18,E09,E18